
Update June 15, 2020
New Lr Mobile release with a few added features (5.3.0):
1. Able to create versions although they are contained in a separate window, not in the Grid view like the desktop (Classic) version.
2. It appears that star ratings survive the export to dng (and TIFF) process but not flags
3. You can round-trip to PS directly while sync’ing is disabled
Update May 15. 2020
One more thing. If the Creative Cloud thing wasn’t enough of an issue, I just discovered on more problem in trying to avoid uploading.
While exporting to external storage as DNG’s works fine, including exporting with all the edits from LR Mobile, what is not included is any flags or ratings of the images. So, if you go through all the images, flag the “keepers” and rate the best images, none of this will survive the export process. - Update 6/15/20: with the latest release of Lr Mobile (5.3.0), I noticed that while flags don’t survive the conversion to dng, star ratings do survive. This offers a (slight) benefit in being able to rate images before backing up to external disk.
So, my solution is to, as before, create two folders on the external disk - 1 for originals and 1 for edited selects. When importing to LR desktop, keep this folder structure intact so that, from within LR desktop you can easily identify the selected dng’s and rate them from within the desktop app. This is not ideal but does solve the problem.
With this folder structure, there’s no need to upload to the cloud to get the images on LR desktop. Just plug in the external disk, tranfer the images to a folder on the desktop, then import to LR. Of course, this is all quite fast and efficient, independent of internet bandwidth.
Update May 14. 2020
This update is more of a confirmation of the earlier posts below. This is based on using the new iPad magic keyboard which, indeed, is magic.
1. On The new iPad magic keyboard, connect power adapter to keyboard usb-c port.
2. Connect card reader to the other usb-c port and import the images to Lightroom
3. If enabled, the images will be uploaded to the Adobe cloud. On the other hand, it is recommended to pause sync’ing if traveling (see earlier posts).
4. Remove the card reader (no need to eject) and connect the Samsung disk.
5. Look for 2 folders on the disk - Lightroom Backup-Originals and Lightroom Backup-Edited DNG.
6. From Lightroom select all the images. Then “share -> export to Files. Select the Backup-originals folder and save. This will create a backup of the original files.
7. For any edited files you wish to backup, select the files then “share -> export as-> select DNG and hit the check mark at the top right of the screen. From the resulting pop-up select save to files and put in the backup-Edited DNG folder.
Alternatively, use the Kingston Nucleum hub and connect both the card reader and the backup disk. Then use Files to transfer the originals from the camera card directly to the backup originals folder. In this case, make sure you connect the power to the hub, not the keyboard.
This process also works if sync’ing is paused (preferred for WiFi-challenged environments). I ended up just exporting (DNG) all the files that are “keepers”, edited or not. That way I can import to Lr Classic CC from the DNG backup folder on the external drive and ignore all the rest. No need to upload to Adobe’s useless cloud
Note, it may be a good idea to cull out all the rejects and delete them before backing up the originals. Saves space and duplicated effort when importing to Lr Classic CC.
Any images that you want to post to Instagram or to include in shareable albums, are best exported to Camera Roll from where they can be shared as well as viewed across multiple iCloud (Apple) platforms.
Slowly getting to where there’s no need for Adobe Cloud.
Unlike with Lr Mobile where you can “pause” sync’ing and thereby avoid uploading to Adobe’s cloud, with Photoshop (iOS) there is no way to prevent it trying to upload as a photoshop document. You can turn off WiFi but as soon as it’s turned on again, the upload will start. This would not be so bad but once this document is in the cloud, it looks like the only way to delete it (permanently) is to go to the cloud website and delete it from there. In the quest to avoid Adobe’s cloud bottleneck, it may be a good idea to learn Affinity.
The good news is, that with WiFi turned off, the edited PS image can be exported back to Lr Mobile as a Tiff.
Update, March, 2020
OK, Having tried all the experiments listed below and also scoured the Internet for anybody who has successfully created a “robust” workflow for the iPad / LR in the field (none found), I have decided to create my own.
The key to a “robust” workflow is to assure best perfomance as well as a viable backup strategy that includes backing up ratings, and edits. This is accomplshed by connecting an external drive to the iPad and backing up to that drive.
Clearly there are issues in trying to “share” files from LR Mobile while they are simultaneously being uploaded to the Adobe cloud. So:
1. Clear out all images from LR CC on the iPad. Make sure local storage reads zero
2. Set LR CC to disable (pause) syncing
3. Use the Kingston Nucleum USB-C hub. Connect to the iPad and to a power source. Connect the Samsung 1TB (or 2TB) SSD drive to the spare USB-C socket. Connect the XQD card reader to a USB port. You’re now ready to ingest images and back them up.
4. For a specific “project”, create two folders on the Samsung Drive - 1 for originals and one for dng exports. Remenber that if you edit a RAW file then you can export this file as dng and retain the edits. If you export the original, edits will be lost. The idea is that we immediately write the originals to the first folder and only send dng’s to the second folder if any chages / edits have been made to that file and you’d like to back it up (changes include flags and ratings.
5. Insert the XQD card into the reader and open the Files app on the iPad. You should see the folder for the XQD card as well as the other two folders we will be using for backup.
6. Select the files to ingest and “Move” them directly to the original backup folder on the Samsung drive. These files will then be copied directly to that folder. My measurements showed that 100 images (of approx. 60MB each), transferred this way, took 1min 15sec.
7. Having backed up these images, they can now be ingested into LR CC using the normal method (LR CC will have already “seen” the XQD reader and opened a dialog to start the import process. For 100 images, it takes about 1min to copy and a further 2 min 30 sec to import for a total of 3min 30 sec. Not bad. At this point you have originals imported to LR as well as a backup of the origianls on the Samsung drive. Notice that this is somewhat redundant since we already have a backup on the XQD cards but better safe than sorry.
8, You can now review the images, flagging, rating and editing them as desired. If you want to keep the edits (and you should), then you can export the edited images as dng’s to the second folder on the Samsung drive. In the event that the iPad crashes, this backup will be the only copy you have of the edited images so this is an important step. Measurements of performance showed that the dng conversion took 28sec for 10 images and 6 min 30sec for 100 images. Clearly it slows down (non-linearly) as the number of images increases.
9. Repeat this process as new images are created and added to the library.
10. If you take images on the LR Camera they will go into the LR catalog on the iPhone. Since syncing is paused, they will not be uploaded to the cloud. It is possible to Airplay them to the camera roll on any local device from where they can be imported into LR. This also works for images taken on any other iPhone camera since they will automatically be included in the camera roll.
Now, upon return, you have a choice. One alternative is to ignore the cloud and simply import from the drive directly into LR Classic on the desktop. A second alternative is to “un-pause” syncing and allow the contents to upload to the cloud then back down to the desktop. Not having tried it, I’m not sure which is the better choice. Stay tuned.
Update, March, 2020
On a trip to Colombia where internet access is slow to non-existent. Here are some observations.
- An unforeseen consequence of only using the iPad is that I need to have Wi-Fi enabled in order to access e-mail etc. Even if it is slow. From what I can tell, this triggers LR (iOS) to try to upload images that are ingested locally. Maybe this can be avoided if “Pause Syncing” is enabled but I haven’t tried this yet. It seems that, while images are being uploaded, it is not possible to back them up to an external drive, even If they are stored locally (I believe the storage is in the “cache”). Thus backing up is impossible until all images are uploaded which, in my case, is taking days.
- I took several images using the LR (IOS) camera, capturing DNG files. It is possible to ingest these files by connecting the iPhone directly to the iPad and importing. However, it seems that the full resolution DNG is only made available for editing once the image is uploaded to the Adobe cloud then downloaded into LR. Again, in a WiFi-challenged environment, this makes these images difficult to access for editing. Maybe disabling sync may solve this problem, worth investigating. Or, preferably, use a RAW camera that saves directly to the camera roll then import from there.
In general, the desire for LR to upload and depend on the cloud really gets in the way and a solution needs to be found that can keep the entire mobile workflow local until access to high speed Wi-Fi is enabled.
Returning home:
As expected, once LR CC had sync’d with the iPad over my local network at home, the images showed up under “All Synced Photographs” in LR Classic CC. I had previously set up this folder in my “Pictures” Directory (see LR Classic CC Preferences).
I turned off syncing on LR Classic CC and moved the files to a new folder in my pictures directory.
However, I noticed that the number of images in this folder was different (by 20 images out of 1070) than in LR CC. It turned out that most were movies recorded on my iPhone then imported to LR CC on the iPad. There were a few other images, mostly from the iPhone that didn’t make it over. For the movies, I exported them from LR CC on the iMAC to a specific folder (Lightroom Saved Photos) and then imported them from this folder into LR Classic CC. Beware of this issue in the future. The other images (2 total) I ignored but could have also imported them using the same technique.
Note: another method for importing images taken on the LR iPhone camera is to Airdrop them to the desktop machine. They go into the Camera Roll from where they can be imprted into LR Classic.
I then deleted all images in LR CC leaving sync in LR Classic CC paused. Everything cleared out of Adobe’s cloud and local storage leaving me with the dedicated local directory on my iMAC containing all the (edited) images from the trip, including videos.
Update, February 25, 2020
As a way to avoid issues with LR wanting to upload images and sync with Adobe’s cloud. I disabled sync’ing in LR on the iPad. The reult of this is the following:
1. All images imported are held in “Local Storage”, on the iPad
2. Images can be exported, as original or dng’s, to an external; disk for backup
3. Images can still be transferred to Photoshop on the iPad and round-tripped back to LR (TIFF)
4. Images can be exported to the Camera Roll
This feels like the simplest way of dealing with LR on the iPad while traveling. Upon return, sync’ing can be turned on and the images will be uploaded to the cloud then back down to the desktop LR.
Further, if you use the LR camera to capture dng’s, these images can be Airdropped to the iPad as originals or dng’s. They will be put into the camera roll from where they can be imported into LR on the iPad.
While I haven’t tried this, an alternative to using the cloud to sync up with the desktop is to export all originals to an external disk. Plus, for any images that have been editied, export dng’s to the external disk. You can then attach the disk to the desktop and import from there. However, you will probably loose flags and ratings along the way unless you export all dng's
Update, February 20, 2020
On a trip to Colombia where internet access is slow to non-existent. Here are some observations.
- An unforeseen consequence of only using the iPad is that I need to have Wi-Fi enabled in order to access e-mail etc. Even if it is slow. From what I can tell, this triggers LR (iOS) to try to upload images that are ingested locally. Maybe this can be avoided if “Pause Syncing” is enabled but I haven’t tried this yet. It seems that, while images are being uploaded, it is not possible to back them up to an external drive, even If they are stored locally (I believe the storage is in the “cache”). Thus backing up is impossible until all images are uploaded which, in my case, is taking days.
- I took several images using the LR (IOS) camera, capturing DNG files. It is possible to ingest these files by connecting the iPhone directly to the iPad and importing. However, it seems that the full resolution DNG is only made available for editing once the image is uploaded to the Adobe cloud then downloaded into LR. Again, in a WiFi-challenged environment, this makes these images difficult to access for editing. Maybe disabling sync may solve this problem, worth investigating. Or, preferably, use a RAW camera that saves directly to the camera roll then import from there. (However, remember that only Adobe RAW (dng) will be compatible with DXO if you want to do noise reduction)
In general, the desire for LR to upload and depend on the cloud really gets in the way and a solution needs to be found that can keep the entire mobile workflow local until access to high speed Wi-Fi is enabled.
Returning home:
As expected, once LR CC had sync’d with the iPad over my local network at home, the images showed up under “All Synced Photographs” in LR Classic CC. I had previously set up this folder in my “Pictures” Directory (see LR Classic CC Preferences).
I turned off syncing on LR Classic CC and moved the files to a new folder in my pictures directory.
However, I noticed that the number of images in this folder was different (by 20 images out of 1070) than in LR CC. It turned out that most were movies recorded on my iPhone then imported to LR CC on the iPad. There were a few other images, mostly from the iPhone that didn’t make it over. For the movies, I exported them from LR CC on the iMAC to a specific folder (Lightroom Saved Photos) and then imported them from this folder into LR Classic CC. Beware of this issue in the future. The other images (2 total) I ignored but could have also imported them using the same technique.
I then deleted all images in LR CC leaving sync in LR Classic CC paused. Everything cleared out of Adobe’s cloud and local storage leaving me with the dedicated local directory on my iMAC containing all the (edited) images from the trip, including videos.
Some useful links on Lightroom Cloud with LR Classic CC:
https://lightroomkillertips.com/all-synced-photographs/
https://lightroomkillertips.com/5-reasons-to-use-lightroom-cloud-for-desktop/
Update, January 19, 2020
Round-Tripping.
Now that we’ve covered the process of ingesting and backing up images into LR CC (iPad), the next step is to figure out what other apps LR CC works with.
The candidates are:
Editing:
Photoshop
Affinity Photo
Storing:
DropBox
Files
Camera Roll
Sending:
Airdrop
The mechanisms are (select one or more images - > “Share”)
Share to…. (JPG. TIF, DNG)
Share & Invite - intended for sharing albums
Open in (Original, JPG, TIF, DNG)
Edit in - use to access Liquify or Healing in Photoshop Fix (JPG)
Export to Camera roll (Original, JPG, TIF, DNG)
Export to Files (Original, JPG, TIF, DNG) - can export to iCloud Drive, Creative Cloud, On My iPad, DropBox
Export as… (Original, JPG, TIF, DNG) - can save to Files (external disk) and other things.
For most purposes, for editing, you can use “Open In” or “Export as…” then select the appropriate app.
Note that for JPG and TIF you can specify the image dimensions all the way to “native” resolution
Returning to LR CC from Photoshop:
Share -> Publish & Export
TIFF -> Export
Select Lightroom -> Launch Lightroom Now
Returning to LR CC from Affinity Photo
Select -> ...
Export
Export as TIF
“Share”
Select Lightroom -> Launch Lightroom Now
Update, January 2020
iOS has been updated to 13.3 and the iPad now has it’s own OS (also 13.3)
The iPad can now support external storage, accessed throught the Files app. Also, Lightroom CC (Mobile) can import directly from attached devices without going through the camera roll. All good changes.
So, the workflow for injesting and backing up images is as follows (assuming there is no Internet connection):
1. Attach appropriate card reader to the USB-C port on the iPad.
2. Start LR CC and import the files from the memory card. They will import directly to LR CC
3. Disconnect the card reader (no need to eject).
Basically, for injestion, that’s it. You can now use LR CC as normal.
Backup.
With the ability to add attached external storage there is now an opportunity for backup in addition to local storage on the iPad as well as retaining the data on the camera memory cards. This may seem redundnt but is an extra safeguard, just in case.
The backup process is:
1. Attach an external drive to the USB-C port - I use the Samsung T5 1TB device. Make sure the device has enough space for backup
2. In LR CC, grid view, select images for backup from “… -> Select”
3. Select “Share -> Export as -> Original -> ✓” (could also select DNG if desired
4. A dialog box should pop up. Scroll to “Save to File”
5. The external disk should show up in the Files directory (Samsung_T5_1TB). Select, or create a folder to hold the backup images. I created a “Lightroom Backup” folder.
6. Press “Save”
7. Check inside Files to make sure the images have been transferred.
Note that the file names of the backed-up images will have been changed to <Filename><long suffix>. Not sure why this is and couldn’t find a way to disable it. I’m guessing Adobe has some convoluted reason for making sure the actual original file and the backup copy are not confused.
To recover from the backup, just point LR CC to import from the designated Files folder. I noticed that it will only import images that are not already in LR CC, even if they are in the Deleted Items collection.
Also note that this backup process will only backup originals. Any edits performed in LR CC will not be transferred. However, if you export as DNG, all edits are preserved (yeah!). The resulting DNG file is smaller than the original RAW file which is expected.
Also, since there is confusion over whether DXO PHotolab supports DNG, I transferred the DNG file to DXO and it read it fine. Good news since I can now use their PRIME noise reduction feature on these DNG files. Remember, in this mode, DXO will ignore any edits on the DNG file and open the unedited version. This is consistent with how it deals with RAW files.
I also opened the DNG files in Capture One (20) and they worked fine, including reading DXO.dng files.
Update, September / October 2019
I just returned from a trip to Utah and Las Vegas. I took only the iPad. I was using the Nikon Z6 & Z7 so I used an XQD card reader with my iPad pro. For much of the trip, Internet access was sporadic at best so not much uploading was going on until we reached las vegas.
Much of what has been noted below is still relevant. I was using IOS 13 but there was no support for direct import to Lightroom as yet. So, I needed to import to the Camera Roll first, then to Lightroom CC.
I used “Recipe #2” (see below) to transfer images to Lightroom Classic CC on the desktop. I think this is the best way. This requires setting up a folder (in Lightroom Classic) for the images. In addition, I received several images from others directly into the Camera roll. I exported these images (as originals) to the same folder and manually imported them to lightroom.
I used SnapBridge on some shoots so I ended up with jpegs in the Camera Roll which were duplicates of the RAW images. They needed to be deleted. However, the process worked and I got geo-tagged images although with not very accurate location. Since I was using the Z7 and the Z6, Snapbridge doeas not support bluetooth connections on more than one camera ta a time. I usually forgot to change the camera in Snapbridge when changing cameras. This extra step turned out to be a limiting factor in using SnapBridge, especially on fast-paced hikes.
Bottom line is that it’s still a pretty clunky workflow and should only be used if you want to carry the absolute minimum of computing equipment. Plus, “flushing out” the duplicate images from the iPad is still a pain (see also the process below)
Update on the use of iPad, March 2019
OK, it’s now 2 1/2 years since I experimented with using the iPad for primary workflow while traveling. Since my last report (July 2016) I have rarely used the iPad for this purpose, preferring to travel with my MacBook Pro (13”) and using a Sumsung SSD drive for backup. However, as expected, a number of new products have been delivered since my last report and these change the game considerably.
1. Adobe has fully commited to Lightroom CC as the version of the app which uses the “Creative Cloud” (CC) as the primary storage paradigm. Plus it has added significant features, both to the desktop and mobile versions, which make it a viable DAM tool with extensive editing capabilites (although not quite as extensive as the traditional Lightroom Classic CC). So, Lr Mobile has been replaced with Lightroom CC for the iPad
2. Apple has deliverd on new versions of the iPad with significant increase in processing power and storage. I currently have the iPad Pro (2018), 11” with 1TB of storage. I’m hoping this will eliminate any field issues with running out of internal storage and needing to “cull” images to make everything fit. Also, with plenty of memory cards, there is little need for external backup so long as you don’t erase the cards
3. Memory card capacities have increased considerably (even up to 1TB). On the other hand, with Nikon, the standard is moving to XQD cards which require a dedicated reader for importing.
4. Apple Photos now supports RAW file formats although I’m not sure what benefit this has for an Adobe-centric workflow.
5. Other apps have emerged which can provide much more comprehensive editing cababilites on the iPad. In particular, Affinity Photo provides a viable alternative to Photoshop. Plus, Adobe has committed ot “Full” Photoshop on the current versions of the iPad this year (2019)
However . .
Because Lr CC for the iPad is much more integrated into the CC workflow, there are complications in using it in combination with the desktop Lr Classic CC
There is a particular use-case which is not well covered in the blogs/forums etc. This is when you want to continue to use Lightroom Classic CC for DAM and final editing (on the desktop) but want to use Lightroom CC in the field to capture images on iOS devices, edit them and then download the results back to LR Classic CC back home. The issue is that when syncing is enabled on Lr Classic CC, anything that is done on Lr CC (and put into an album) is downloaded into a special "cache" (album) called Lr Mobile on Lr Classic CC. This is really a catalog and it's pretty well impossible to extract the images + changes so that they can be inserted into the traditional folder structure of Lr Classic CC. (update: The images also show up In “All Synced Photographs" in Lr Classic CC. These images can be moved to any local folder on the desktop)
I’m surprised (and frustrated) that Adobe does not adequately address this use-case because I would guess this would be quite common, especially since many photographes are reluctant to jump from Lr Classic CC to Lr CC with all the ensuing “baggage” of committing to cloud storage in a bandwidth - limited environment and the lack of plug-ins and all the other stuff that comes with Lr Classic CC. Nevertheless, it is compelling to be able to use a smaller device like an iPad or even iPhone on the road and have images and edits sync up with the desktop app on return.
While clumsy, I found a way to solve this problem by doing the following:
In the field:
1. plug a card reader into the USB-C port of the iPad (via an adpater). Plug in the memory card containing images.
2. The Photos Import screen should come up automatically and show the images to import. Select the ones you want and import into the camera roll. You can then remove the memory card
3. Open Lr CC on the iPad.
In settings -> Cloud & Storage Sync, uncheck “Only download smart previews” (we have plenty of space) and check “prevent From Sleep”
In Settings -> Local storage, it’s a good idea to clear the cache at the beginning of a session to make sure old stuff is purged.
In Settings -> Import, make sure “Auto Add From Camera Roll" is disabled. This will ensure that other images in Photos do not get accidentally imported.
4. From Lr CC select images from the camera roll to import. The images should quickly show up in the Lr CC “All photos" window and uploading should commence automatically. At this point, optionally, you can delete the images from the camera Roll and also clear out the “recently deleted folder in Photos. If you don’t have a viable Internet connection you can always pause sync’ing and upload later.
5. At this point, even while the images are being uploaded, you can start to edit and filter the images. Note that the facility to create virtual copies is not available so it’s not easy to create multiple versions of the same image. I’ll come back to this issue later. Also, DO NOT create any Albums. We want to have control of what gets imported into Lr Classic CC and so we want to prevent any automatic downloading to Lr Classic CC and the primary mechanism for this is through Albums. So not having any will prevent this auto download.
6. From an “in the field” pov, you’re now done. No additional backups are necessary since you have local RAW copies in the Lr CC catalog as well as in the cloud (maybe) as well as having RAW original on the memory cards and, if you didn’t delete them, RAW images in Photos. You can also export (share) images to various destinations if needed.
So far, this part of the workflow is fine and not much different from the previous Lr Mobile workflow.
Back home:
1. Open Lr CC on the desktop and make sure all images (+edits) from the iOS device have been uploaded and sync'd to the desktop LR CC.
2. Don't create any albums in Lr CC, see #5 from “In the field”.
3. Select all the images you wish to import into LR Classic CC and do a "Save to” (right click). The default folder is called “ Pictures/Lightroom CC Saved Photos". Save the originals + changes (sidecar XMP files). You could also do this save to any folder of your choice which actually may be more convenient.
5. Shut down Lr CC and open Lr Classic CC. Do an import of photos and video and point to the folder you saved the images to. Uncheck "don't import duplicates" if necessary and then import the images. They should come in with all the edits from Lr CC.
6. You can then go ahead and delete the images from Lr CC to save space in the cloud.
Since no albums were created in Lr CC no additional sync downloads should occur. You can check this by looking at the collection set “From Lr Mobile”. It should be empty. Also check tthe status of sync’ing with Lr CC. If you have other (desktop) albums which you would like to edit in the field by uploading smart previews, make sure sync’ing is enabled.
At this point you can go back to Lr CC and delete all the images and clear out the cache. I have 120GB of storage in the CC cloud which should be enough for short trips. So I can delay clearing everything out until returning home. If I need more space in the cloud I can always get extra from Adobe.
Notes on Making multiple versions of edited images in Lr CC on the iPad:
1. Select an image to make multiple edits. Edit image then “Save to Files”. This will save a jpeg version of this edit to iCloud. To re-import from iCloud, go to Files, select the image and export to Lr CC. The jpeg should show up in the "All photos" window and be uploaded like everything else. You can then go to the edited RAW version and reset it to the imported state and make alternative edits. Unfortunately the edit settings are not preserved in the jpeg export.
Next Step.
Affinity Photo is an app for the iPad which has a lot of the functionality of Photoshop. It will read RAW files and it is possible to perform extensive, layered edits beyond what you can do with Lr CC. In addition you can export the finished results to a variety of file formats (including 16-bit TIFF) so that you can maintain a high intergity image (not jpeg). This image can be imported into Lr CC. There are a number of limitations not least of which is that Affinity only has access to the original RAW image (in the camera roll) so it's not possible to combine edits done in Lr CC with Affinity (at least I can't find a way). However, this is another way to edit images on the iPad and I'll give it a try. I'm guessing that when Photoshop finally arrives on the iPad, there will be much better integration with Lr CC thus eliminating the need for Affinity. Thatis, unless Affinity is much better and easier. Also, Affinity has a desktop version so it may be a viable (although unlikely) alternative to Photoshop.
Update March 15, 2019:
OK, I have now field-tested this workflow during a short trip to Hawaii. The “In The Field” part of the workflow performed as expected. Here are the pros and cons.
What worked:
1. Import of images from the XQD card was fast (<1sec per image)
2. I had auto import of images from the camera roll enabled by accident and so images were imported from the camera roll right into Lr CC (no previous images were imported but images captured on the iPhone were imported. So, not sure about this setting, probably should leave it disabled).
3. Editing was fast and easy although the UI is different from Lr Classic CC which I found confusing.
4. I exported an edited image to the “Files” folder then re-imported back into Lr CC as an edited duplicate (in Jpeg). This may be a place where auto-import is beneficial by exporting to the camera roll verus Files.
5. Even with “hotel-quality” Internet, upload was OK. However, I only had 88 images total so it wasn’t much of a stress test.
6. The iPad 11” + pen is a nice way to edit images.
What was an issue:
1. I found the lightroom UI confusing to navigate. It’s certainly different from Lr Classic CC and subtley different for Lr CC on the desktop
2. Lack of virtual copies was an issue ( and almost a show stopper since I make extensive use of this in Lr Classic CC).
3. Lack of plug-ins and other features of Lr Classic CC certainly felt like a limitation. I was less inclined to do edits preferring to wait until I got home so I could edit on the desktop.
4. The built-in Presets were hard to find and felt limiting. Many seemed to yield similar results.
5. Editing for B/W felt very limiting (couldn’t find color filters).
6. Not quite convinced of the lack of need for additional backup. While the originals are well secured (on the memory cards and in the iPad), to fully backup the edits as well requires that the images are completely uploaded to the cloud. For bigger projects, I’d worry that this may take too long and thus expose the edit information since it is only resident on the iPad during the upload time.
Now for the “Back Home” part of the workflow:
1. Upon opening Lr CC on the desktop, the images from the cloud were quickly loaded into the desktop. I assume they were smart previews. The edits were consistent with the iPad.
2. I set up a folder on my Drobo to hold the downloaded images. I then selected the images I wanted to download and downloaded them (+edits) to the folder. File -> Save To -> <Selected Folder>. This took a while.
3. I then opened Lr Classic CC and imported the images from this folder.
The first thing I noticed was that each image had an associated vitual copy that was tagged as a smart preview. I suspect this was because I had Sync turned on in Lr Classic CC. I erased everything and turned off sync, then re-imported. This time the virtual copies were not there. I’m not sure if the spurious virtual copies were as a result of sync being turned on or some other reason. I need to investigate this further. This download experience seemed clumsy to me and was not as easy as I would have liked. Also, because the images selected were a combination of jpegs from the phone and NEF’s from the camera, some additional folders showed up containing stuff I didn’t fully understand. These folders were outside of the target folder and dated. I deleted them and there seemed to be no impact.
When I look at the worflow required to be able to ingest and edit on the iPad then transfer to the desktop (Lr Classic CC), I’d say it was overly complex and easy to screw up. Plus there are exposures where having additional backup will be required. It’s clear that Adobe wants you to us either Lr CC (preferred) or Lr Classic CC but not both. For me this is an issue since I’m nowhere near ready to give up on Lr Classic CC but would like to use the iPad while traveling. Maybe I’m missing something?
Finale, clearing out the iPad storage:
Now that everything has been imported to Lr Classic CC, all images on other devices can be deleted. here’s the procedure:
1. Delete images from the Camera Roll and also from the “Recently Deleted” album in Photos.
2. Delete the images from Lr CC. This could be done on the iPad or desktop. Not sure which is best. Check that Lr CC is empty on the desktop, iPad and web (lightroom.adobe.com)
3. Clear the cache on the iPad (Settings -> Local Storage -> Clear Cache
Check that cached files are 0GB
If original images were imported to Lr CC on the iPad (see note below), they are likely to be still there. Check “locally Stored Copies” and you can see how much storage is taken up by these originals. Right now, the only way I can clear these out is using iExplorer on the MAC.Connect the iPad to the MAC. In iExplorer, go to Apps -> Lightroom CC -> <folder with long name> -> Originals and delete the contents. Restart Lr CC on the iPad and the Locally Stored Copies should be zero.Also check that “Available Cloud Storage” is the maximum (120GB. With Lr CC on the iPad completly cleared out, on the iPad, “Documents and Data” for Lightroom CC still was 1.32GB. The App was 196.9MB.
Notes:
1. Despite the complexity, it is best to download originals to the iPad. The screen can take them and it makes things mpre precise for editing and cropping.
2. It looks like it’s best to turn off sync’ing on the desktop Lr Classic CC in order to avoid getting unwanted smart previews. Worth experimanting more with this.
3. If you want to continue to edit the images on the iPad, put them in an album in Lr Classic CC, check the sync button, turn on sync and they should show up in Lr CC on every device.
A word on backup.
It is (ideally) necessary to have at least two copies of all images (on different devices) at any point in time. These copies should be at the maximum quality (RAW) and include adjustments and edits from Lr CC if needed. When using my D850 with a laptop, I can achieve this by having two memory cards in the camera (one for backup), storage in the laptop which is backed up to an external disk. I would use Lr Classic CC for all activities. There is no need for an internet connection since all images are stored locally.
With the iPad and the new Nikon Z7 there are issues with achieving this ideal backup state:
1. The Z7 has only 1 memory slot thus creating risk while shooting that you can lose images if the card fails. I consider this a minimal and acceptable risk
2. It is possible to have two copies of all the original images - 1 on the iPad and 1 remaining on the memory card. In this scenario, it is important to retain the contents of all memory cards used and to have sufficient number for the entire project.
3. If any images on the memory cards are lost, you have the local copies of these images on the iPad. In the absence of an internet connection, they will just stay there. With an internet connection, the images + edits will (eventually) be uploaded to the cloud and secured. If the iPad crashes, you can recover through an iCloud restore from backup but this requires an internet connection. Alternatively you still have the images on the memory cards. However, without the restore, all edits are lost.
From these scenarios it is clear that having an Internet connection available is desireable. With this connection, original images + edits will be backed up plus images on the memory cards will be retained.
Without an internet connection, I have not found a way to back up the combination of original images + edits. They will reside on the iPad and not backup-able to a local device since iOS does not support a local file system or external storage. I did try the WD MyPassport Wireless device but it is only possible to backup the camera roll and (as far as I can tell) cannot backup LrCC on the iPad including the RAW images + edits. So, it’s basically not much use.
So, until I find an alternative, if you want to use the iPad in the field, and ensure secure backup, you’ll need an internet connection but no need for additional storage (other than the original memory cards). If there is no assured internet connection, take a laptop instead plus a backup disk.
Note: One possible scenario is to use Affinity Photo as the primary editing tool. RAW images can be accessed by this app from the camera roll. Upon completion of editing, the resulting images can be saved back to the camera roll in a variety of formats, including 16-bit TIFF. The contents of the camera roll can then be transferred to the WD MyPassportWireless device over a direct wifi connection (I thnk). Further, the TIFF images can be imported into Lr CC for later sync’ing with the desktop.
How many images per card?
With modern cameras (45MPixel +/-) files are in the order of 60MB. That’s approx. 1000 images per 64GB card. So, depending on the project, pick the number of cards needed.
Note. Typically a Santa Fe workshop is approx. 1000 images. Edinburgh + something else is 2000 images. Major Nat Geo trip is 2000 - 3000 images
Recipe #1 - Full control.
This recipe Keeps everything manual - no auto transfer to Lr CC on the iPad, No sync on the desktop Lr Classic CC, etc. The hope is to minimize any unforseen problems and separate Lr CC & Lr Classic CC as much as possible..
1. Make sure CC is empty, clear the cache on the iPad. Clear out any remaining image downloads on the iPad using iExplorer
2. In Lr CC on the iPad, uncheck “only Download Smart Previews” This ensures that originals will reside on the iPad
3. On Lr Classic on the desktop, make sure Sync is Paused.
4. Turn off wifi on the iPad to simulate field conditions
5. Turn off auto import on the iPad
6. Attach card reader to the iPad and load the images into Camera Roll. Remove the card reader
7. Import from Camera Roll into Lr CC on the iPad
8. Upon turning on Wifi, wait for images to upload to CC
9. Once uploaded, go to Lr CC on the desktop and check the images are uploaded and viewable
10. Create a folder to contain the originals + settings from which you can import to Lr Classic CC
11. In Lr CC on the desktop, select images to download. Do a “File -> Save To” and download the images to the selected folder
12. In Lr Classic CC, Import images from the designated folder.
This all worked just fine with no issues. I can now erase the images from the Camera Roll (+ recently deleted), Lr CC and internal iPad storage using iExplorer.
Recipe #2, Cut out Lr CC on the desktop, go straight to Lr Classic CC
1. Make sure CC is empty, clear the cache on the iPad. Clear out any remaining image downloads on the iPad using iExplorer
2. In Lr CC on the iPad, uncheck “only Download Smart Previews” This ensures that originals will reside on the iPad
3. On Lr Classic on the desktop, make sure Sync is ON.
4. Turn off auto import on the iPad
5. Attach card reader to the iPad and load the images into Camera Roll. Remove the card reader
6. Import from Camera Roll into Lr CC on the iPad
7. Wait for images to upload to CC
8. Once uploaded open Lr Classic CC on the desktop, check sync’ing is ON
9. Open up “Catalog -> All Synced Photographs”. The images should be in there.
10. Select the desired images and drag them to a designated folder on you local storage. (you’ll need to set up the folder ahead of time).
11. If necessary, do a local backup
You can then go ahead and delete the images from Lr CC, Photos, etc.
This all worked fine also, eliminating the need to “pass-through” Lr CC on the desktop.
Notes from Europe trip April 2019.
Had a 5 day trip to Sicily. Took approx. 400 images (80/day). I used recipe #2.
1. At this (low) number of images/day I had no trouble with them being uploaded using the hotel wifi. Each new day had the previous days images already in the cloud.
2. I became more comfortable with the editing capabilities and menu system of Lr CC on the iPad. The pencil really helped.
3. Still frustrated with no virtual copies. I tended to make just one set of edits knowing that, back home, I could create multiple versions on the desktop app.
4. Posting to Instagram was easy
5. While I didn't use SnapBridge for Geo-tagging, I wish I had. I ended up manually geo-tagging some of the images where I knew exactly where they were taken. Subsequent testing of Snapbridge convinced me this is a good solution for Geo-tagging, in conjunction with the iPhone.
6. I had one "episode" where the camera said it couldn't read the XQD card. It was an intermittent issue. Removing the card and plugging it back in generally solved the problem. However, I removed it and put in another card. Fortunately I was able to upload images to the cloud but was left with some risk of losing backup images. I tossed the card after I got home ans had backed up the files.
7. Because I have 1TB of storage on the iPad, I generally didn't care too much about deleting from the Camera Roll as I went along. I cleaned out the iPad after I got home.
8. I used two different cameras - Z7 and the Fuji X100F. Neither had the clocks set to the correct time or sync'd. This caused issues in sorting the images in correct chronological order. Another good reason to use Snapbridge (at least for the Z7)
9. I also took images on the iPhone (lr camera / dng). Some were indoors in low light and so had high levels of noise. Since all my favorite noise reduction apps are plug-ins on my desktop/laptop (Dxo, Topaz De-noise AI, etc), I was not able to effectively edit them until I got home. This is a significant gap in iPad apps.
Placeholder:
As a slight variation on Victoria's method, this workflow seems to be doing the trick to achieve what Chuck is asking. This accomplishes the same to migrate albums/collections and originals to Classic and remove originals from CC, but the main difference is that it is easier to delete the album and photos on the CC side.
1. Sync the photos and collections from CC down to Classic
.2. Right-click the synced collection in Classic under 'From Lr Mobile' and choose Duplicate Collection. You now have a local copy of the collection that is unsynced and only exists in Classic.
3. Move the collection to an appropriate location outside of the 'From Lr mobile' collection set.
4. Close LR Classic and open LR CC.
5. Select and delete all photos in the target album. Then delete the empty album.
6. Close CC and reopen Classic.
7. Sync the new copied collection to upload the smart previews to the cloud.
Please let me know if this helps anyone or if you find any caveats with this method.
Update on the use of iPad, July 2016.
It’s been a while since I documented the use of the iPad for photography and a number of advances have been made. Here are a few:
1. Adobe has released a number of mobile apps for iOS.
(1) Lightroom Mobile up to Ver. 2.4 which allows for the import and editing of RAW files - Yeah!
(2) Photoshop Fix & Photoshop Mix
(3) PS Express
2. New apps are available for the iPad, noteably Snapseed
3. Apple has revised it’s iCloud / Photos apps to enable easy sync’ing over multiple iOS devices.
4. Apple has released the iPad Pro with a spectacular 12” display and increased processing power as well as an elegant pen for input.
There are also a number of things which haven’t changed. Most notable is that iOS still doesn’t support RAW image editing. This is rumored to be rectified later this year with the release of iOS 10.
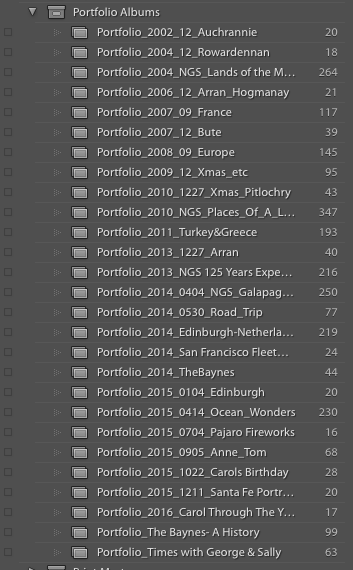
As a consequence of #3 I have started using the Photos app to sync photo albums across multiple devices and have abandoned Portfolio as a result. This has it’s pros and cons and continues to be a point of confusion over which is the best solution. On balance, however, it’s nice to be able to import images into Photos and have the albums automatically propogate across all devices which have the iCloud Photo Library turned on. Here’s my workflow for this.
1. Starting with Lightroom, for any collections that I wish to import into the Photos app, I create individual collections under portfolio Albums.
These collections point to the original images - RAW, Jpeg, Tiff, etc.
2. I then convert the images to Jpeg (to limit file size) and export to Dropbox.

For the D810, and SONY, this creates 2-4MB files. Looking in Finder, you see the following:

3. I then import these files, on my main computer as desired, into Photos and organize into albums. For devices which have the iCloud Photo Library turned on, the albums appear in the Photos App.
4. Using Dropbox as an interim step, has its advantages:
a. It keeps the exported Jpegs out of my Lightroom Workflow which keeps things clean. However, if I ever want to change a collection, it is a tedious process to change the Lightroom collection, export the changes to DropBox, then import them to Photos. Needless to say, I rarely make changes once a collection has been created.
b. Another advantage is that I can access these collections from anywhere, on any device that connects to my DropBox account and can share them through DropBox links if desired.
c. If I’m able to create collections on my iPad, I can upload these directly from my iPad to DropBox as well as import into Photos. Thus I can have albums ready for viewing on Appletv as soon as I get home.
Using the iPad as a primary workflow
OK, so now on to using the iPad as a primary workflow. You’ll need as much storage on the iPad as possible so remove anything that is not essential. My iPad Pro is 128GB and I can get around 85-90GB of free storage. Not enough for a major trip but OK for a few days of shooting. Despite taking up some space (5-6GB), I am choosing to keep my iCloud Photo Library on th iPad. I really like having these albums around and they shouldn't get in the way of the iPad workflow for new images.
General.
Since I began writing this report on using the iPad as a primary workflow device, Adobe released ver. 2.4 of LrMobile which includes support of RAW images and also expanded editing features. This has dramatically altered the usefulness of the iPad as a primary workflow device. It’s still not perfect but has become viable. So, the rest of this report specifically assumes ver. 2.4 of LrMobile (and above).
The conditions required to be able to use the iPad as a workflow device, for me, are to be able to:
1. Ingest images from the camera into the tablet. This means into the Photos app camera roll on iOS. Luckily, Apple supports the import and storage of RAW and Jpeg images although it only recognizes the embedded Jpeg for editing purposes.
2. Use the iPad as backup for RAW images. A RAW file from the D810 or Sony A7RII is about 43MB. With 90GB of free storage, this allows for approximately 2,000 images. While there are ways to extend storage on the iPad, they are not elegant as you will see below. With the release of LrMobile 2.4, RAW images can be ingested into LrMobile (from the Camera Roll). if there is a good Internet connection, the images will be uploaded to Adobe’s CC thus providing automatic backup. However, this option won’t exist in situations where the Internet is inadequate or does not exist (most of the time when traveling). I have a whole section on backup below. Read on.
3. Select and rate images, combine into collections which will be reflected back on to the desktop, thus getting a head start on the post processing process.
4. Use a variety of mobile editing apps (offline) with particular focus on Adobe mobile apps since they appear well integrated with the desktop apps like Lightroom and Photoshop.
5. Easily upload edited collections to the cloud (Dropbox) as well as easily share collections (via Dropbox links or equiv).
6. Easily re-import to the Photos app so that collections can be viewed on AppleTV via Airplay (remember, iCloud photo albums is turned OFF)
7. Easily sync edits with the desktop - Lightroom
8. At a pinch, be able to re-size Jpegs for easy export - like 1000pix on a side. Not essential but desireable.
9. Also desireable to be able to Geo-tag photos and have this preserved in the metadata through to the desktop Lightroom.
OK, I tried the experiment and here’s what happened.
1. I took several RAW images on the SONY A7R II. I imported them to the Photos app on the iPad using the SD - Lightning adapter. They showed up in the Camera Roll Album. The images imported quickly - 2-3 secs per image. I chose to keep the images on the SD card. So far so good.
2. Opened LrMobile, selected camera roll and imported all photos. I also created a Collection (Test Collection) and put the photos into this collection. This step is important since images are only sync’d with CC from Collections. The upload process now began and the files were uploaded to CC. I later checked that they had been sync’d with the desktop Lightroom. On the desktop the images appear in a folder - Test Collection, in a collection set called “From Lr Mobile”. Of course, this upload process only occurs if the iPad is connected to the Internet. Otherwise, the RAW files plus any edits, remain only on the iPad.
3. There are now copies of the RAW files in two places - in the Camera Roll in Photos and also in LrMobile. This is not good since these are big files and take up a lot of srorage. The files in Photos can now be deleted if necessary (including “recently Deleted”) to free up storage. More on this in managing storage and backup.
4. Within Lr Mobile it is possible to flag and rate images as well as perform edits. There are two levels of editing which can be selected - Basic and advanced so there’s plenty to play with. Any changes made are sent up to the cloud to be sync’d with lightroom when a connection is available. This process seems quite quick.
5. Images can be saved to the Camera Roll, as Jpegs, if you want the edited images to be included in a Photos album. The resolution of the images varies depending on whether the original images remain on the iPad (resolution of the RAW image). If they are replaced with Smart Previews, then the resolution is limited to 2540pixels on the longest side. Either way the Jpeg compression is quite severe.
Conclusions so far.
1. Other than the slow initial upload, the process seemed to work quite seamlessly.
2. I sometimes like to make multiple edits of the same image (virtual copies). I could not find a way to do this in Lr Mobile. Best way is to make the edits then export the image to Photos. Then "reset" the RAW file in LrMobile, make some more edits and export that result. And so on.
3. Flagging and rating images was easy and handy for culling down. Viewing with filtered selections worked well.
4. With the editing tools in Lr Mobile 2.4, a lot of what the desktop Lightroom provides is available on LrMobile. There are exceptions which I will go into later.
5. Rendering of the RAW files is a bit soft on the iPad (high quality Jpegs look better). Although the images are rendered at the full resolution of the camera (if the original image is still on the iPad), 2540 pixels if coming from a Smart Preview.
6. Forget trying to do panoramas or focus stacking or HDR. Current tools in iOS, if any, are intended to work on iPhone images and result in image quality you will be disappointed with.
7. The pen interface is really nice, better than a mouse or trackpad.
Importing back on to the desktop.
With LrMobile 2.4 this step should be automatic since LrMobile uploads all the RAW files to CC then sync’s them with Lightroom on the desktop, complete with ratings and edits. If there’s no internet connection on your travels, this process will occur when you get home and have access to the Internet.
Storage management on the iPad
There’s a lot of stuff on the iPad that takes up quite a bit of storage. While some of it is obvious (Apps, photos, videos, music, etc.) others are less obvious - e.x. Documents & Data which accounts for local data consumption by the apps that run on the iPad and, I’m sure, other things. You can check the data consumption for each app by going to Settings -> General -> Storage & iCloud usage -> Manage Storage. Select any app and it will tell you how much storage is used by “Document & Data” for that app. For example, even with the Photos app “empty”, i.e. no photos, including none in the recently deleted album, the app occupies 241MB of storage of which 187MB is a “shared photo stream”, even though all sharing and photo streams are turned off.
Lightroom Mobile (ver 2.4) consumes 118MB of storage when completely empty. This includes 46.7MB of Documents & Data.
To use the iPad as a storage and editing device for photos, it’s important to have efficient use of storage. At a pinch, I can get close to 90GB on my 128GB iPad Pro by eliminating all but the essentials. That’s about 2,000 D810 RAW files (@42MB). With LrMobile 2.4 (which supports RAW) images are duplicated between the Photos app and LrMobile itself. This would be unfortunate since this would half the storage capacity available (unless you delete the images in the Photos app once imported to LrMobile).
So, let’s give it a try.
I took 4 RAW photos on the A7R II totalling 173MB
Before loading into Photos, the Photo Library occuped 53.5MB (empty). The Shared photo stream was 187MB for a total of 241MB
I then imported the 4 images into Photos. The images went into the Camera Roll as well as the Last Import Album.
The Photo Library is now 407MB. First, I noticed that the Shared Photo stream amount had gone down to 9.2KB so the total storage is now 407MB. The difference (407 - 241) is 166MB. Who knows what’s going on but this is close enough.
As a further check I added one more picture (~42MB). The total went up to 449MB. So that makes sense. I now have 5 images imported.
Bottom line, think of the storage “floor” in Photos is around 230MB w/o any images. As images are added, this number increases by the file size of each added image.
I’m now going to import the images into LrMobile (2.4)
Before import, Documents & Data - 46.7MB
After Import, 255MB. Photos storage remains the same. So, files are duplicated in LrMobile. No surprise.
If you have a good Internet connection, there's one handy feature which can be used to minimize the storage needs on the iPad. If the files have been successfully uploaded to the CC, it is possible to download Smart Previews to the iPad and then delete the full resolution files. To do this, click on the "LR" icon at the top-left of the screen. Disable "Download Full Resolution". This will initiate the transfer of smart previews from CC. Next scroll down and select "Clear Cache". This will delete all files which have already been uploaded to CC. After going through this procedure, the size of "Documents & data" for LrMobile went from 255MB (see above) to 48.9MB. The images are now marked "Smart Preview" in the metadata. This capability can have a significant impact on the storage requirements on the iPad. In fact, Smart previews take up only 2-5% of the storage of the original file. So 90BG of capacity is essentially limitless, eliminating the need to manage running out of space.
If it’s possible to upload the RAW files, on the road, then only the Smart Previews need remain on the iPad. Further, once imported into LrMobile, the images in Photos can be deleted further increasing the storage capacity.
A note of caution on Smart Previews. These files are reduced versions of the original RAW file. They have a maximum of 2540 pixels on a side and are highly compressed, lossy versions of DNG. It appears that, when you are previewing images in LrMobile, you are actually looking at a Smart Preview (or equivalent quality) even when the original image is still on the iPad. If you have the original image, and if you crop, the resolution gets better up to the limit of the RAW file. With Smart Previews it doesn’t. Thus, if you need to crop heavily, you may want to have the original resident on the iPad so that you can see the true effects of the cropping, especially if you want to export the cropped file back to the camera roll. You can do this for a single image by first enabling the “Download Full Resolution” option then quickly going to the file you want to crop. Open this file and it will be given first priority for download. Once this is in place you can then crop at full resolution. You can then output to camera Roll as a Jpeg. After that go back and disable “Download Full Resulution” and clear the Cache.
Another artifact of using Smart Previews is that any images exported back to Camera Roll will be constrained to the 2540 pixel limit and also show the compression artifacts of the image. In most cases this is OK on the iPad but not optimal. If you want a larger Jpeg, you need to keep the original RAW file and export at “Maximum” size. This yields a Jpeg at the native resolution of the RAW file but, unfotunately, is still heavily compressed. I’m not sure if there’s a way around this, short of importing a high quality Jpeg from the camera, but I’ll keep digging. Otherwise, live with the reduced quality while on the road.
Clearing out the iPad.
In order to maximize storage space on the iPad, it will be occasionally necessary to delete all the photos in the Photos app. Normally this can be done by deleting the photos and also deleting everything from the “recently deleted” album. I looked in to the iPad using the iExplore app and confirmed that this removes all deleted images. However, there can be a lot of random, empty folders lying around on the iPad and if you want to do a general clean-up, you can use the iExplorer app to do that. Please see the following link for more information. I tried this and it worked OK.
Notes on Back-up Workflow
An important part of being able to use the iPad in the field is to have a workable backup strategy. As noted earlier, there does not appear to be a viable backup product for the iPad since the file system is not externally exposed. However, a couple of new products have appeared which may offer a solution:
1. Kingston MobileLite Wirelss G3/Pro. - This device ($50) creates a dedicated wireless network which allows the iPad to connect to a variety of storage devices like SD cards and USB connected storage. It offers the promise of being able to backup the camera roll.
2. Western Digital My Passport Wireless Pro ($220). - This is a 3TB hard drive with it’s own dedicated wifi network. It also promises to allow for the backup of the camera roll and other things.
I will go into detail later but, while both these devices “work” each has some severe limitations which, at best, add complexity to the backup workflow.
The best way to see if these devices work is to define, and execute, a viable backup workflow. Here’s my first cut:
Usage in the field:
1. iPad Pro, 128GB (90-100GB available)
2. Do not rely on an internet connection - even when you have one, rarely do they have enough bandwidth to upload large image files
3. Have at least two copies of both the original (RAW) files as well as edited versions as well as any Jpegs (i.e. all files) at all times. This should be exclusive of any cloud storage which should be regared as a “bonus”. Obviously, copies cannot be tied to a single device.
4. Ability to create a Photos album which can be displayed on Apple TV. Creating an “on-the-go” album could save a lot of time
5. Ability to provision a Dropbox folder to contain a target (Jpeg) photo collection. This should be ready to go as soon as an Internet connection is established
6. Ability to export selected images to a USB storage device w/o needing an Internet connection. On some trips, it’s necessay to export selected images so they can be presented while on the road.
7. A viable process to deal with “overflow”, that is when the iPad runs out of storage and images need to be removed to make room for new ones.
8. A viable process to do “recovery” if anything goes wrong
Here are four possible scenarios:

Conditions:
1. Only the iPad, no laptop or backup needed. Images are stored on the camera cards (don't delete them) and the iPad. Edited RAW files and Jpegs can be uploaded to Adobe CC and/or Dropbox. Delete images in the Camera Roll once imported into LrMobile
2. While there’s no Internet connection, all the images can be contained within the iPad. So, no external backup is needed so long as images are deleted from the Camera Roll after import to LrMobile and the camera cards are retained and not erased
3. This is essentially the same as #1. However, it will be necessary to work with “Smart Previews” and also to delete images from the Photos app after they have been imported to LrMobile and Sync’d with CC. If you’re not sure about the Internet connection, go to #4
4. Probably the most likely scenario for significant travel trips. Because you can’t rely on being able to upload images to CC, they need to remain on the iPad as RAW files. Hence since the storage requirements are likely to exceed what’s on the iPad, backup will be necessary as well as a process to handle “overflow". More to come.
Random notes from experiments:
Backup (no Internet).
There are a number ways to backup all RAW+Jpeg using the MyPassport Wireless Pro (3TB):
1. Connect the iPad Pro to the Passport USB port (set to automatically transfer data). The Passport treats the iPad as a “camera” and automatically imports from the camera roll into the USB folder on the Passport. RAW & Jpeg files are transferred as well as any Jpegs that have been added through the editing process. Transfers are incremental. That is, if additional images are added to the camera roll and the iPad is again connected to the Passport, only the new images are added to the USB folder. I have concluded that this is not the best way to do backup since the iPad may contain other images which are downloaded as part of the iCloud Photo Library. There are other ways to backup these images as described below.
2. Plug the SD card from the camera into the SD slot on the Passport (set to automatic transfer). All files from the SD card are automatically transferred to the SD Folder on the Passport.Transfers are incremental. This is the most efficient way to back up images directly from the camera. If the original SD cards are not erased, this combination ensures there are two copies of the original files. I'd recommend this as the first step in the backup process.
3. Jpeg edits which are imported back into Photos should be backed up to the MyPassport Wireless Pro (MyCloud) as needed.
Without an Internet connection available, what will NOT be backed up is any changes to the Lightroom (RAW) files as a result of ratings & edits performed within LrMobile. I'm assuming that any "keepers" will be exported back to Photos as Jpegs, which can be backed up, so at least you'll have a Jpeg copy to work from when you restore the original files. Jpegs can also be sent to MyCloud directly from LrMobile. I'm hoping that when Apple eventually supports a full RAW workflow, this restriction will be eliminated.
Dealing with Overflow (no Internet).
Without an Internet connection, original RAW files need to be retained within LrMobile (and possibly also in Photos although I can't think why you would need both). Sooner or later, you'll run out of space and need to clear out the RAW files to make room for more. Since the original files should be on both the SD cards as well as on the MyPassport, You can go ahead and delete them within LrMobile. Selected (maybe all?) images should be exported to Photos as Jpegs so at least you have copies to view on the road. Does metadata export to Photos?
Export (no Internet).
The My Passport has a USB2.0 port on the back. It is possible to plug in a USB dongle and transfer files from the My Passport to the dongle.
Archive:
This probably still works but no longer needed.
In the event that you need to get images off the iPad to an external device (ex. USB Dongle), you will need the MobileLite Wireless G3 device. Right now, only Jpegs will be transferred.
1. Insert an SD card into the MLW-G3
2. Connect the iPad to the MLW-G3 wifi network
3. Open up the MobileLite app and then open File Explorer
4. Go to Camera Roll and select the album you wish to transfer.
5. Select the images and hit the copy icon
6. Select the SD Storage folder and hit “OK”. The transfer will commence.
7. When complete, remove the SD card
You can follow the same procedure with an external SD card.
So, yes, if you want to do both backup and export to an external device you’ll need both the Passport and the MLW-G3. Not ideal but do-able.
Notes on Useage.
Passport.
This device occasionally loses it’s wifi connected and needs to be re-started.
If transfers from USB or SD are not set to automatic, there is a button on the unit that you can press to initiate the transfer. I could not get this to work
MobileLite.
In exporting the Camera Roll, for RAW+Jpeg files, only the Jpeg is transferred. I’m going around with tech support on this since they are unable to replicate this problem. I’m guessing it’s an iOS issue. I see the same when backing up the camera roll on the passport.
Resizing images.
I found an app for the iPad called Reduce. This app, when given access to the camera roll, can resize images to whatever dimension you like. Personally, the most useful is "1000pixels on the longest side". This can be set up and then used to batch process a series of images. Processed images are put in an album called "reduce export". Quite handy. This album can then be exported to a USB thumb drive (or SD card) using the MLW-G3.
Geo-Tagging.
I found an app for the iPad/iPhone called Geotagr. It will do geo-tracking and then allow you to geo-tag photos on the camera roll based on time. It is important to synchronize the time on the camera clock with the iPhone/iPad. There is also GPS4cam (only for the iPhone) which does much of the same thing but needs access to a laptop to do the syncing.
http://www.cultofmac.com/279170/add-gps-dumb-camera-photos-using-iphone-ipad/
www.galarina.eu/faqgeotagr/
In working with Geotagr, it is quite easy to geotag images within the Photos app. Further, the Geotagr app will synchronize between devices (the phone and the tablet) if they are on the same network. Thus geo-tracks which have been generated on the iPhone will appear on on the iPad and can this be easliy used to tag images in the Photos library. One unfortunate limitation is that it will only tag Jpegs and that the tags are only viewable within the Photos app. The gps coordinates are not written in to the image metadata but exist as a "side car" which is read by the Photos app. So, forget being able to tag and export the images to another app and have the tags remain intact. One workaround which is offered is to create copies of the images with the tags embedded. This only works for Jpegs and also renames the files which is confusing.
Another solution is to use GPX files. These are files containg the sequence of coordinates of a particular track. Geotagr allows you to export GPX files for a particular track to Dropbox or iCloud. These files can then be read by Lightroom (in the Map module) and used to tag images, back on the desktop. While you don't get the instant gratification of seeing the gps data while on the road (except in the Photos app if you decide to tag Jpeg edits) you are capturing the essential detail which will make this possible once you get back to the desktop. GPX files are also generated by other GPS devices. I like to use the Holux M1000-C with a bluetooth adapter on my Nikon cameras. It is possible to extract the GPX files from this device via their dedicated app (Windows only).
UPDATE 6/12/17.
I noticed that iOS RAW import for Fujifilm cameras (X-Pro2 and X100F) ONLY works with uncompressed files. Make sure you have this set before using with the iPad workflow. Photos will import the (compressed) files but will not show a preview. LrMobile works with compressed or uncompressed.
ARCHIVE - Notes on using the iPad from 2010.
The iPad holds the promise of revolutionizing mobile computing. It’s form factor is ideal as a photography accessory - small, lightweight, good battery life, excellent display, storage, etc. The question is what can you do with it? Ideally, there a number of obvious uses. Here is a sample workflow:
1.Download pictures from the camera into the iPad as a backup to CF cards
2.Select favorite pictures and edit using iPad apps
3.Publish selected pictures to a gallery in Mobileme, or e-mail, or whatever
4.Potentially, upload selected images (RAW) to iDisk or other cloud storage
5.When you return home, transfer the photos to the home computer - both original RAW images as well as edited (& published) Jpegs.
The question is, with the current rev of the iPad, and with available apps, can this be done?
Let’s take these one at a time.
Transferring pictures from camera to iPad
- First, you need the iPad camera connection kit which enables you to connect the camera (or USB card reader) directly to the iPad via the camera’s USB cable.
- Plug in the cable and turn on the camera
- The Photo app should automatically start up and show thumbnails of all the pictures on your camera’s CF card. You can import all files or only those you select. You can also delete selected files but be careful because they get deleted off the CF card. The import is slow - approx 5 sec per RAW file. At completion of the import you are asked if you want to delete the photos from the camera. I usually don’t.
- At the end of the import process, switch the camera off and remove the USB cable. You are taken to the album “Last Import” which will contain only the pictures you have just imported. There is also an album called “All Imported” that contains everything including previous imports. It does not look like you can create new albums inside the photo app (they can only be sync’d with iTunes) so we are stuck with these for now. So far so good.
- Note 1, if the camera takes a RAW + Jpeg, they show up as a single thumbnail, as they should.
- Note 2, As of now, this is the only way to get files into the iPad, from an external USB device, without Jailbreaking it.
Transferring pictures from the iPad to a computer Using Lightroom
I’m skipping ahead in the workflow here but in many cases, when using the iPad as a backup device, this will be the next step. I’ll come back to using apps later.
- Connect the iPad to the computer with its USB cable
- Launch Lightroom (3)
- Select File -> Import Photos . .
- The iPad should show up under “Devices” and the thumbnails should show in the window.
- You can do all the transfer operations expected (file renaming, backup etc.). I have a destination folder already set-up called “Transfer from iPad”. Select this folder as a destination. Import all or selected pictures. The original RAW files will be imported into the selected folder. You can also create a new (sub) folder if you prefer.
- It would be handy to be able to delete the pictures automatically from the iPad once imported but that option does not seem to be there.
- You are now in Lightroom-land!
Transferring pictures from the iPad to a computer Using Nikon Transfer
You can use the same method as above to transfer images from iPad to a designated folder using Nikon Transfer. By default, images are copied from the iPad. However, under “preferences” you can check a box that will delete the images from the iPad after transfer. This is handy if you have limited space. Be sure to note this before transferring in case it is accidentally set and you decide you don’t want to delete the images. In fact, if you are restoring from an iPad backup, the you definitely don’t want to delete since you will be left with only one copy (on the computer).
You can then import to Lightroom from the designated folder.
More on deleting pictures from the iPad
At some point, once safely transferred to a computer and backed up, you will want to delete pictures from the iPad, en-mass. I have not found a way to do this with Lightroom. It allows you to COPY images from the iPad but does not allow you to delete them on the iPad. However,
- The easiest way is to select the “last Import” album on the iPad and hit the transfer button. You are then prompted to select pictures and have a variety of choices, including delete.
- Open Nikon Transfer with the iPad connected. The screen will show the pictures available for import. Without actually importing, you can select pictures for deletion and then click on the trash can. After a prompt, you can batch-delete the pictures.
- Using Adobe Bridge CS5, you can import to a specific folder then batch-delete from the iPad. Again, you can then import to Lightroom from the designated folder (or set up an automator action to do that automatically). Remember, this is dangerous if your only copy is on the iPad.
Editing Pictures On iPad
You can use a variety of editing programs to process pictures on the iPad. These include the following:
- Photogene
- ***Filterstorm http://filterstorm.com/
- PhotoForge http://www.ghostbirdsoft.com/photoforge/
*** looks like the best one so far.
Each app lets you select files from your Photo Albums, manipulate them and save them to the “saved photos” album. You can then go back to the Photos app to view them, slideshow or upload/e-mail. Note that, depending on the application, you have a choice of resolution for saving the files. Be sure to pick the maximum resolution. You can also transfer the saved files back to the computer and Lightroom using the same process as outlined in “Transferring pictures from iPad. . . “ above.
Publishing pictures from iPad to a MobileMe gallery
For this workflow, it would be nice to be able to publish to a MobileMe Gallery directly from the iPad. This can be accomplished right inside the Photos application.
- Open the Photos app and select a photo to publish. It needs to be opened to full-screen mode.
- From the menu at the top right of the screen, you can select “Send to MobileMe”
- You can then select an existing Gallery to send the pictures to. I couldn’t find any way to create a new gallery. This will need to be done in Aperture (create a blank album, name and publish to MobileMe)
- Also, unfortunately, it looks like you can only publish one picture at a time (unlike e-mail which can be done with multiple pictures)
- The URL for the gallery will be of the form: http://gallery.me.com/mikeramsay#<num>
Where <num> is a 6-digit number assigned when the gallery was first published.
Uploading Original Image Files to iDisk
Finally, this step in the workflow would be handy in using iDisk as cloud backup. Unfortunately I can’t see any way to do this. There are plenty of apps which will transfer image files but they all convert to jpeg first. So, they could be used as a sort of “dooms day” backup where, if all else fails, you are left with jpeg versions of your original files. Doesn’t really make much sense. As a result, if the idea is just to carry the camera and the iPad while traveling, and you need to maintain at least two copies of each file in it’s original form, then these files need to be kept on the original CF cards and on the iPad. The number of files will depend on the capacity of the cards and iPad. Right now, I have a 32GB iPad of which 29GB is the maximum capacity and I have 21.2GB available. For a D700, RAW, 14-bit, each file is 15.8MB. That means the maximum capacity of the iPad is approx. 1335 files. Not enough for extended trips.
Note 1. I just discovered that if you e-mail a picture from the Photos app, it actually goes out in its native format (RAW). This is unusual since I would expect e-mail to convert to jpeg and downsize to lower resolution. This is hardly an effective way to upload images but it could be done.
Technical Stuff - image resolution.
The iPad converts the RAW files to jpeg for editing (or it uses the embedded jpeg that comes with the RAW file. I’ll check this later).
Note: from Diglloyd: “Peeking around the file system reveals that the importer extracts the full JPEG and makes a scaled version (preview) as well as thumbnail on the fly.”
Different editing apps will save in different resolutions and this needs to be set for each app:
- For PhotoForge, go to the “Settings” and select PhotoForge. Set the resolution to “Max”
First field trip with the iPad (no laptop!)
Carol and I are taking a road trip to Moab (Arches National Park, CanyonLands National Park) and, perhaps, Mesa Verde if the weather holds out. The trip is from march 25, 2011 to March 29, 2011. I intend to take a lot of pictures of the great scenery. I’m now OK with the iPad for e-mail, web browsing, etc. But I will take a bluetooth keyboard in case I need to do any major text entry (unlikely). I’d like to use the iPad to do the following:
- Backup for images taken on my DSLR’s. I have a 32GB iPad with about 19GB of available space (I took everything off the iPad except for the essentials (apps, pdf’s of maps and info on the locations). At about 15MB per image, this gives me backup space for about 1260 pictures. This is marginal, but worth the risk. If the worst comes to the worst, I can cull down the back-up images to remove all the duds. I have ordered a 64GB iPad2, so if my experiment works, I have a better solution going forward (at least for short trips).
- Edit selected images (if needed) and up-load to a mobileme gallery for the trip. I set the site up already, from Aperture, with a placeholder title image.
- Notify selected friends and family so they can view the gallery.
- Try out taking photos from the iPhone and sending directly to the mobileme gallery (if possible)
The idea is, for short trips, I don’t need to do much editing on the road but would like to “publish” stuff along the way. Also, because this is a “carry-on” trip, I want to minimize the amount of equipment (and weight) carried. A MacBook Air may be a good solution, also, but I don’t have on of those (yet).
For the trip, I have the following:
- D700 (main) and D7000 (backup) cameras with all the lenses, batteries, filters, flash etc.
- 2 X 32GB of CF cards for the D700 plus 32GB SD for the D7000. This should be ample as primary storage.
- iPad with charger
- iPhone 4
- Camera connection kit
- USB cable to connect my D700 to the iPad (my D7000 uses SD cards which plug right in to the camera connection kit.
Trip notes:
- I ended up taking approximately 600 pictures over the 3 day period and loaded all of them on to the iPad using the camera connection kit. Most pictures were with the D700. The transfer was easy but took a while, with each picture taking 4-5sec. The total amount of storage was approx. 9.5GB
- It was easy to browse the pictures on the iPad using the Photos app. Unfortunately there is no way to sort or rate pictures or filter them to see only the selected ones. I realized this is an important part of the process for me using Lightroom on the MAC.
- The stored pictures consisted of the original RAW image plus a Jpeg preview. It is not clear to me whether this preview was generated in the iPad or was the embedded preview in the RAW file. I’ll experiment with this later.
- Conclusion so far is that the iPad is a fine device for backup provided you have enough storage to accommodate all the pictures. Interestingly, when I connected the iPad to iTunes, The storage “bar” did not register the space taken up by the pictures. If this is correct then it could be easy to run out of space without knowing.
- I had already set up a Gallery on MobileMe for this trip and it was easy to upload selected pictures to the Gallery. This worked well and the Gallery was easily accessible from any browser.
- I started to have issues when I wanted to edit the pictures before publishing. I tested the following apps: PhotoGene, Filterstorm, PhotoForge and pirRAWnha. With the exception of piRAWnha, all the other apps crashed all the time. I figured it was related to memory issues and shut down all the open apps. This didn’t help much. Finally I downloaded the “pro” version of PhotoGene and this worked great. In fact, this became my default editing program. Here are some of the features:
- Variable size thumbnails allowed for easy selection
- -Star rating system and filtering to help sort out the good pictures
- -Adequate editing functions
- -Ability to save files at max resolution
All this allowed me to do some rudimentary editing before publishing to my gallery. I’m guessing the editing was done on the jpeg preview and not using the RAW file.
- I took a lot of pictures that were stacks for panoramas and HDR’s(bracketing). A stacking feature would have been nice. There are no good panorama or hdr apps for the iPad. I tried Autostitch but it couldn’t align the panoramas. I’ll keep looking for an hdr program but I’m guessing this will end up being a process on the MAC for a while.
- GPS data seemed to survive the process and, until the batteries ran out on my GPS device, pictures were tagged with location.
Conclusions. For short trips, the iPad is a great device for picture backups. The editing apps are adequate enough for pictures that are “almost right” and can output files for web publishing or e-mail. For serious editing, on the RAW files, you will need a laptop. This is especially true for panoramas and hdr’s. I like to play with the pictures on the editors so this limitation is a big one for me. Feels like a MacBook Air is the way to go for me. Nevertheless, a small camera, plenty of storage cards and an iPad makes a very compact, effective system for travel digital photography
Using the iPad for storing and displaying photo albums.
One common way to present photo albums is on the iPad and also on the TV via AppleTV. With albums on the iPad, you can do both. There’s a lot you can do with Photostream and iCloud but I find these capabilities confusing. It feels like it’s all or nothing with little flexibility to control and edit albums. Maybe in a later article I can tackle this confusion but, for now I wanted a simpler way to export selected photos to the iPad without going through too many steps. Prior to this my default method was to export selected albums to iPhoto then sync them with the iPad. I wanted to eliminate iPhoto since it has little purpose other than sync’ing. Here’s my method of the moment:
1. I found a popular iPad app for presenting photo albums - Portfolio for iPad. Intended as a tool for professionals to display their wares, it has a nice UI, is easy to import and connects to AppleTV via the built-in Airplay of the iPad.
2. Workflow: Import pictures into Lightroom
3. Eliminate the “duds”, do edits as required and “Flag” pictures to include in a collection
4. In grid mode, filtered as “flagged”, select all and create a new collection with the flagged images
5. In the collection, rearrange the images as needed (can’t always do this in Grid mode if the images are stored in different folders). You now have a “Master” collection based on the RAW (edited) originals.
6. Select all in the collection. Go to “Export”. Select the user preset “Export Jpeg-Med-Dropbox”. Specify a (sub)folder and rename the images, then export. The images will be converted to good quality Jpegs and exported to Dropbox for secure storage.
7. Open “portfolio Loader” on the Mac and point to the directory in Dropbox containing the desired images
8. Open Portfolio on the iPad, create a new gallery and import the files form the Mac (make sure the iPad and MAC are on the same network).
After import, you’ll have the original images, in their original location, imported into Lightroom and arranged into a collection. You’ll have Jpeg copies of this collection stored in Dropbox, renamed to preserve sequence. You’ll have the same Jpegs, downloaded into the iPad, in Portfolio, for viewing and sending to the TV via Airplay (make sure you have Airplay mirroring enabled on the iPad)
Note. Could probably have exported directly to Dropbox but not comfortable giving Portfolio access to my Dropbox account.
This looks like a good method for now. A possible downside is that it is awkward to change the album once it has been exported and downloaded to the iPad. I guess the way to do this is to create a new album, download it then erase the old one. Not very elegant.
On storing Photos in Dropbox.
Dropbox has a feature where it presents all photos stored in your dropbox account under “Photos”, dated and organized. Thus the photos are viewable on any device with access to your dropbox account. Further, these photos can be organized into albums and can be shared. While this is the case in the Web View version of dropbox, I have not been able to see the albums on the iOS version. I can only view the photos as organized by dropbox themselves.
There are apps which will organize photos for you (like Unbound) but they require access to your login credentials. Since I use Dropbox for everything, I’m not keen on giving these credentials to a third party. So that’s not an option unless I set up a separate account for pictures which I may do in the future.
Despite the dramatic increase in storage available from Dropbox, right now my plan is to use it to store just the jpeg albums (collections, Galleries, whatever you want to call them) which I have created in Lightroom and exported (see above). That way I don’t clutter Dropbox up with all the other photo stuff which I don’t really need access to when I’m mobile. Further, I have other ways to back up my photos, outside of Dropbox.
Using the iPad